Final Fantasy Resonance beginner’s guide: what to do first and what can wait
Difficulty, Stagger, saving, Tents and the Chapter 1 pickups worth your time, plus the small tricks that make the first hours easier.
Spoiler warning. This guide names bosses, areas or story moments. Bigger reveals stay hidden in spoiler blocks until you open them.
Quick answer
Start on Normal, save at the pink points, keep Tents in your bag and build every fight around Stagger. In Chapter 1, take the Dream of an Idealist quest for Rain’s Flamberge, recruit Cloud and collect all 12 Tablet Shards for the Stagger Ring. Siren ends the chapter, so bring Lightning attacks and Charm protection.
Chapter 1 of Final Fantasy Resonance teaches a lot in a short space. Fights are random encounters, healing runs off a stat you haven’t used before, and the whole combat system hangs on one idea called Stagger. I’d want to know a handful of things in those first hours, and a few habits keep paying off later on.
Pick a difficulty
You choose Casual, Normal or Expert when you start a new game, and none of them is locked in. Casual softens enemies and makes them easier to stagger, Normal is the standard setting, and Expert makes fights harder in return for 1.5 times the Mastery points. EXP and gil are the same on all three, and so is the story content.
I’d start on Normal and keep Expert for later, when you have Visions worth levelling. To change it, open the System Menu, go to Options and find Difficulty on the Gameplay tab. You won’t find it in the title screen’s Options. It only appears once you’re inside a save.
How stagger works
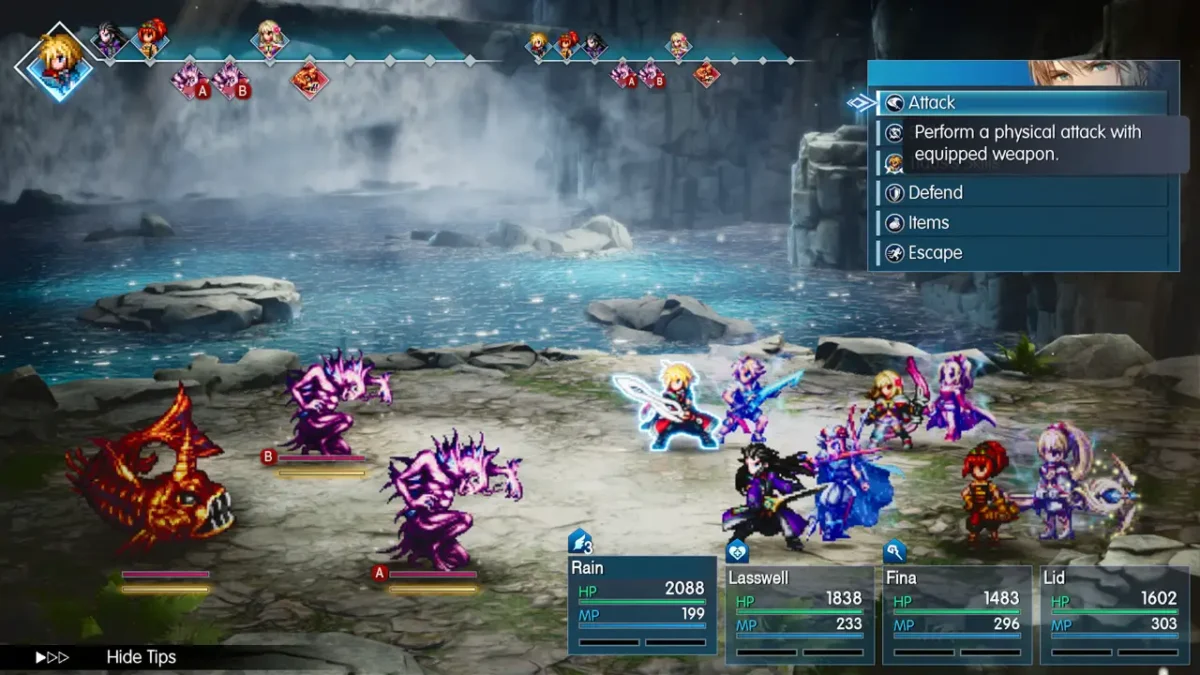
Every enemy has a stagger gauge under its HP bar. Empty it and the enemy staggers. It misses its next turn and takes extra damage. Hitting an elemental weakness drains the gauge much faster than anything else. That’s what you’re really hunting for in every fight.
Bonus Phase and Sweeping Stagger
Whoever staggers an enemy earns another action once the round ends. That window is the Bonus Phase. It doesn’t have to be an attack. A heal or a buff is a perfectly good use if the party needs one. Stagger every enemy on the field in a single turn and you get a Sweeping Stagger instead. That gives the whole party a Bonus Phase action and lets one character finish with their Vision’s Resonance attack, free of charge.

Against a group, a Sweeping Stagger is worth more than killing one enemy quickly. Against a single weak enemy that falls in two hits, don’t plan anything at all.
Stagger works as a defence too. A staggered enemy skips its turn. If the timeline along the top of the screen shows something nasty coming, break that enemy first and it never happens.
Choose skills by stagger power
Check the little symbols next to a skill. A sword is physical damage power, a staff is magic damage power, a light ray means Sanctity affects it, a cross is healing and a bullet is stagger power. Some skills hit hard and others drain the gauge, and the Power of Skills tutorial is worth reading once.
One small habit pays off straight away. Land the last hit on an enemy that’s already staggered and the fight gives 1.3 times the Mastery points.
Find weaknesses with Libra
Libra costs 1 MP and shows an enemy’s weaknesses and resistances. Cloud brings it with him, and once you’ve learned what an enemy is weak to, the game keeps showing it on later encounters. You only pay for each enemy type once.
Saving, tents and resting
Save at the pink save points in towns and dungeons. On the field map you can save whenever you like. A Tent restores HP and MP for the whole party, either at a save point or anywhere on the field map. That makes them good between fights while you’re levelling too. They cost 300 gil (the item shop in Felicitas sells them), and I’d buy a few every time I pass a shop. Keep some Ethers as well for MP when a save point is out of reach.
An inn is cheaper at 100 gil a night in Felicitas, and it has a save point inside. Some dungeon save points also offer Teleport, which jumps you between the dungeon entrance and its deepest point.
Encounters are random, and the mini-map in the top right has a sensor that turns red when one is about to start. Use that warning to save or heal first, so the next fight doesn’t find you on empty.
What to do first in Chapter 1
- Take the Dream of an Idealist quest. Pick it up in Grandshelt as the chapter begins. Rain gets the Flamberge greatsword at no cost, which is stronger than his starting weapon and adds 140 HP.
- Recruit Cloud. Visit the Village of Kol first and the desert opens up. Cloud’s Sanctum is in the northwest of it, southwest of the Cavern of Swords. He suits Lasswell, brings Libra and learns Deathblow, a skill with a chance of a critical hit, at Mastery Rank 3.
- Grab every Tablet Shard. They’re glowing pickups in towns, ruins and dungeons, 12 of them in Chapter 1, and a few sit behind scenery such as broken pillars. Take them to the Enigmatic Princess at the Oblivion Palace, east of Grandport Harbor. She pays out at 3, 6, 9 and 12 shards with a Vitality Charm, Earrings, a Magicite Shard and the Stagger Ring, which adds 10 percent Stagger power.
- Say yes to the side quests. There are four in Chapter 1. A new one shows up as a blue exclamation mark over an NPC, and you can read the rewards before you accept. Some pay out equipment or Magicite Shards.
- Visit the Sanctums you pass. Warrior of Light, Terra and Cloud all have one in Chapter 1, and Tronn and Leah join through the story. That makes five Visions by the end of the chapter.
Visions and Mastery
Visions are echoes of heroes from the other Final Fantasy games. Equip one and the character gets new stats and skills, and every fight you win with it fills Mastery Points. Each time a Vision ranks up you unlock abilities, and those stay with the character after you swap, as long as they fit inside your ability cost limit. You never have to commit to one Vision for the whole game.
Mastery is tracked for each character separately. Give each one their own Vision for a while and swap when it’s maxed. Pick the Visions worth the time first. There’s no need to grind Mastery in Chapter 1. It speeds up later in the game anyway.
Awakening is a separate system. Take a Vision to the Moogle of Light at Grandport Harbor and spend Magicite on it: a Magicite Shard for the first star, Magicite for the second and a Magicite Cryst for the third. Chapter 1 hands you seven Magicite Shards, enough to awaken all five of your Visions once.
At each Sanctum of Light you answer three questions about the hero. The answers change nothing. The scene itself revisits that hero’s story from the original game, so skim the dialogue if you plan to play the older ones. The dialogue choices that do matter are a separate list.
Siren at the end of Chapter 1
Siren waits at the top of Siren’s Tower, northeast of Grandport Harbor, and the ships can’t leave until she’s beaten. She’s level 11 with 20,000 HP and she’s weak to Lightning. Cloud, Tronn and Warrior of Light all have a move for that. The real problem is Allure, which charms party members into attacking each other.
Sort out Charm protection before you climb the tower. Monk’s Prayer Beads stop it, and you can get three: one from the armor and accessory merchant in Grandport for 1,500 gil, one from a chest on the tower’s second floor and one for finishing Secrets Unearthed, Chloe’s quest in Felicitas. Short of a set? Put Leah on Fina, because Nullify Charm protects whoever wears her.
Be at level 11 or above, and use the last save point to rest in a tent first. Beat her and she becomes your first Esper.
Healing and Limit Bursts
Healing power comes from Sanctity and Magic Attack has nothing to do with it. Fina has the highest Sanctity in the party. She’s your healer, and Sanctity is the number to check when you compare gear for one.
Every character also has a Limit Burst that unlocks when their gauge is full. It shows up in the skill menu with an LB tag instead of an MP cost. I’d save them for bosses.
Exploring
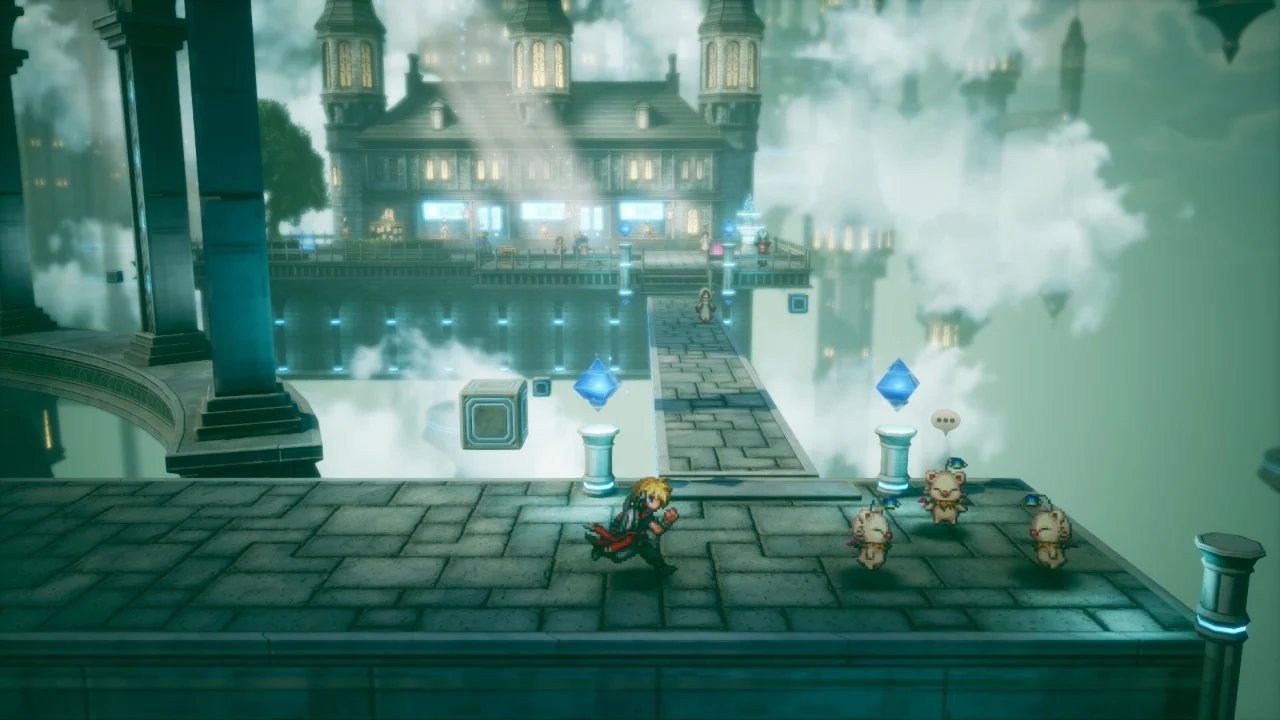
Glance at the mini-map in every new area. It shows narrow paths that are hard to spot on screen, and they often lead to chests. The castle approach in Chapter 1 has grass paths on both sides of the main walkway with chests tucked at the end.
Shops matter too. Check what a new town sells and compare it with what your party already wears before you spend any gil. Side quests and treasure chests nearby often pay out better gear than the local shop, so look there first.
On the world map, sparkling spots hold items. Check them on your way past. In towns, an exclamation mark on the mini-map marks an NPC with information or a bulletin board. Those can tell you where a side quest starts or where an Esper is hiding. Once you’ve discovered a place you can fast travel back to it from outside a dungeon.
The Colosseum, the Merchant Ship and the Legendary Arms all open up later. None of this has to happen in a hurry. Once you’re past Chapter 2, it’s worth learning how AP and double actions work, and how to farm MRP without losing an evening to it.
Did this guide help?
Something wrong or out of date? Tell us
Guide by
Sunny
Sunny’s favourite game is Stardew Valley, and she has told herself “one more day” about four thousand times. The rest of her time goes on dying in a basement in The Binding of Isaac and planning her whole week around who she’s hanging out with in Persona.
Up next in Final Fantasy Resonance
Popular right now
-
GuidesMidgame
-
GuidesEarly game
-
GuidesMidgame
-
GuidesMidgame




Squad chat
Be the first