
Final Fantasy Resonance trophies and achievements: how to unlock all 40
All 40 Final Fantasy Resonance trophies and achievements, a roadmap to the Platinum, and the parts that need planning: Tablet Shards, Adamantite, Legendary Arms and Ultima Weapon.
Spoiler warning. This guide names bosses, areas or story moments. Bigger reveals stay hidden in spoiler blocks until you open them.
Quick answer
There are 40 trophies on PS5 and 40 achievements on Steam and Xbox, and none of them can be missed. Casual difficulty is enough for every one. Play the eight chapters, clear the side content from your airship in whatever order suits you, and keep Ultima Weapon for last. Plan on 50 to 70 hours in total, and tick things off in the checklist below as you go.
Eleven of the 40 Final Fantasy Resonance trophies come straight from the story, so they arrive on their own: the eight chapter clears, the full party, your first chocobo and the airship. Everything else is optional content, and a lot of it only opens up once the airship is yours in Chapter 5.
A few trophies are worth planning around instead of stumbling into. Resonance Rapid Fire wants 400 Resonance attacks, The Harder They Fall wants all 15 Cave Masters, Will Crystallized wants all 26 Visions, and My Name Is Ultima… wants you to beat the one boss that properly tests your build. The rest is a long list of things to find, with a couple of hidden requirements (89 Tablet Shards, eight pieces of Adamantite) that the trophy text doesn’t tell you about.
Trophies and achievements by platform
| Platform | What you earn | Good to know |
|---|---|---|
| PlayStation 5 | 40 trophies: 1 Platinum, 4 Gold, 7 Silver and 28 Bronze | The Platinum is called Ultimate Fantasy and pops once the other 39 are done. There is no PS4 version. |
| Xbox Series X|S | 40 achievements worth 1,000 Gamerscore | Xbox Play Anywhere covers the Microsoft Store version on PC too. |
| PC on Steam | 40 Steam achievements | Steam Deck Verified. Keep Steam Cloud switched on for both the demo and the full game if you want the demo save to carry over. The PC build uses Denuvo. Seventeen of the achievements are hidden until you unlock them. |
| Switch and Switch 2 | No trophies or achievements | The two versions use separate saves, with no upgrade pack between them. |
Steam and Xbox have no Platinum, so Ultimate Fantasy shows up there as the 40th achievement and unlocks for finishing the other 39.
Difficulty doesn’t touch any trophy. Casual unlocks every one of them, and you can change it from the options menu at any point in the game. That helps in two places. Expert pays out 1.5 times the Mastery points while you level Visions, and Casual makes Ultima Weapon a much shorter fight (the numbers are in its section).
The free demo covers all of Chapter 1, and its save carries into the full game. Load it on the same platform and account you bought the game on and the trophies you earned in the demo, the chocobo and a Cave Master among them, unlock straight away. Demo data only transfers while no full-game save exists. Start from the demo save before you make a fresh file.
Platinum roadmap
- Play all eight chapters. Pick up Tablet Shards when you spot them, and once a Vision reaches Mastery Rank 9 on a character, hand that character a different one. You’ll want a spread of maxed Visions later.
- Reload your cleared save. A short scene on the airship starts the postgame, and the whole map stays open from there.
- Clear the side content. I’d go sub quests first (several give permanent stat boosts), then Visions and Espers, then Cave Masters from the lowest level up, the Colosseum leagues, Aileen’s weapons and the Legendary Arms.
- Cross Dragon’s Maw at level 55 or higher. King Gil Snapper and Metal Gigantuar are on the island at the far end, and it’s also the best EXP and gil farm in the game.
- Beat Ultima Weapon. Do it with maxed Visions and your best gear.
- Finish the Resonance count. If Resonance Rapid Fire is the last one left, use the farming loop in its section.
Trophy checklist
Ticks are saved in this browser only, so they won’t follow you to another device. Each row shows the PS5 trophy grade and the share of Steam players who have unlocked it.
0 of 40 done
- A Journey BeginsEasyBronze · 70.0% of players
Clear Chapter 1.
Comes with the story. The free demo covers all of Chapter 1, so you may have it already.
- Those Who Unite the SkiesEasyBronze · 50.4% of players
Clear Chapter 2.
Comes with the story.
- Olderion BluesEasyBronze · 34.5% of players
Clear Chapter 3.
Comes with the story.
- Viva la RevoluciónEasyBronze · 23.6% of players
Clear Chapter 4.
Comes with the story. The Colosseum in Grandshelt opens during this chapter.
- In Search of the TruthEasyBronze · 10.6% of players
Clear Chapter 5.
Comes with the story. The airship arrives at the start of the chapter and opens up most of the optional content.
- And the Winner Is…EasyBronze · 6.3% of players
Clear Chapter 6.
Comes with the story.
- Past GloryEasyBronze · 4.0% of players
Clear Chapter 7.
Comes with the story.
- Aspiration’s EndEasyBronze · 2.4% of players
Clear Chapter 8.
Comes with the story. Save before the last teleport in the Crystal Tower, because there is no way back after it.
- Those Who Defy FateEasyBronze · 11.2% of players
Unlock all party members.
All eight join through the story. The last one arrives in Chapter 5.
- Kweh!EasyBronze · 83.7% of players
Obtain a chocobo.
You get it in Chapter 1, in the Village of Kol.
- Airship EnterpriseEasyBronze · 22.3% of players
Obtain an airship.
Chapter 5. From here the whole map is yours to explore.
- Conscience RenewedMediumBronze · 3.1% of players
Clear all party member substories.
Each of the eight has their own sub quest, and several give permanent stat boosts, so do them as they appear.
- Magicite HunterEasyBronze · 62.2% of players
Defeat a cave master.
Marauder in Grandshelt is level 15 and the gentlest of them.
- The Bigger They Are…MediumBronze · 17.0% of players
Defeat 5 cave masters.
Work up from the low levels. They drop Magicite for awakening Visions.
- The Harder They FallLong grindGold · 1.2% of players
Defeat all cave masters.
15 in total, up to level 60. Leave the level 60 trio in Pharm until your party is ready, and bring the airship for Malboro Varietas.
- Just Getting StartedEasyBronze · 19.6% of players
Clear all Fledgling League fights in the Colosseum.
Five fights between levels 25 and 32. Battle 2 pays out Adamantite and battle 3 an Ancient Greatsword.
- Arena FighterMediumBronze · 6.3% of players
Clear all Brawler League fights in the Colosseum.
Five fights between levels 40 and 48. Battle 5 is a two-wave elemental fight, so bring every element.
- Career FighterHardSilver · 2.9% of players
Clear all Gladiator League fights in the Colosseum.
Levels 55 to 70, finishing with Gargantuan Gigantuar. This is the toughest of the three leagues you need.
- Princess’s RewardEasyBronze · 71.6% of players
Receive a reward at Oblivion Palace for the first time.
Hand three Tablet Shards to the Enigmatic Princess to open the first safe.
- MementoMediumBronze · 9.6% of players
Help the enigmatic princess regain her second memory.
Turn in 60 Tablet Shards. The first memory scene plays at 28.
- Gil Comes and GoesEasyBronze · 35.6% of players
Spend a total of 100,000 gil.
Shops and vendors both count. The merchant ship’s Adamantite and Ancient pieces come to 120,000 on their own.
- Making Lid ProudMediumBronze · 9.0% of players
Gain a total of 1,000,000 gil.
Counts everything you earn across the whole game. Gil Snappers are the quick top-up.
- The Weapon that Suits the UserMediumBronze · 5.8% of players
Have Aileen craft a weapon for the first time.
Finish the Forger of Wills side quest in Dilmagia, then give Aileen one Adamantite.
- The WeaponsmithHardSilver · 1.3% of players
Have Aileen craft weapons for all party members.
Eight Adamantite in total, so none are spare. Two of them sit in Oblivion Palace safes, at 80 and 89 shards.
- Ancient ArtifactMediumBronze · 4.7% of players
Obtain one of the Twelve Legendary Arms for the first time.
The Ancient Greatsword from Fledgling Battle 3 is the quickest piece. Take it to the Chamber of Arms and win the trial.
- Legendary ArmsLong grindSilver · 1.0% of players
Obtain all Twelve Legendary Arms.
Find all 12 Ancient pieces and clear each trial. Two come from Tablet Shard safes, at 76 and 84 shards.
- Struck GoldHardBronze · 2.6% of players
Defeat a King Gil Snapper for the first time.
Level 49 and weak only to Ice. Cross Dragon’s Maw (level 55 or higher) to reach its island.
- Priceless ExperienceHardBronze · 3.0% of players
Defeat a Metal Gigantuar for the first time.
Same island as the King Gil Snapper. Break its stagger gauge first, because it can’t dodge while staggered.
- Mechabo ManiaMediumBronze · 7.1% of players
Upgrade Mechabo to his ultimate form.
Three requests from Verun, and the last one needs a trip to Gronoa. The details are in the Mechabo section.
- The First Step Towards MasteryEasyBronze · 39.1% of players
Reach max Mastery Rank for a Vision for the first time.
Max is MR9. Battles feed it, so it arrives on its own.
- Awakened LightMediumBronze · 16.3% of players
Awaken a vision to its limit for the first time.
Take a Vision to three stars at a Moogle of Light: Magicite Shard, then Magicite, then a Magicite Cryst.
- Visions AssembleEasySilver · 43.8% of players
Obtain 10 visions.
Comes early. Sanctums, shrines and sub quests all hand Visions out.
- Will CrystallizedLong grindGold · 3.5% of players
Obtain all visions.
All 26 are available in free roam. Sanctums, shrines, sub quests and one fight with Sephiroth.
- Vision ConnoisseurPlan earlySilver · 20.5% of players
Reach max MR with 8 visions.
Needs eight Visions at MR9. Swap a Vision out as soon as it maxes on a character so everyone keeps climbing something new.
- Esper’s CovenantEasyBronze · 40.3% of players
Gain help from 3 Espers.
Siren is the first, in Chapter 1. Only Fina and Archwitch Fina can summon Espers.
- The Sovereigns of the PlanetMediumSilver · 3.3% of players
Gain help from all Espers.
Nine in total, spread across the story and a few optional spots.
- Keep Them on Their ToesEasySilver · 4.5% of players
Stagger enemies 1000 times.
Hit weaknesses and the yellow gauge empties by itself. You will pass 1,000 well before the credits.
- Resonance Rapid FireLong grindGold · 0.5% of players
Use Resonances 400 times.
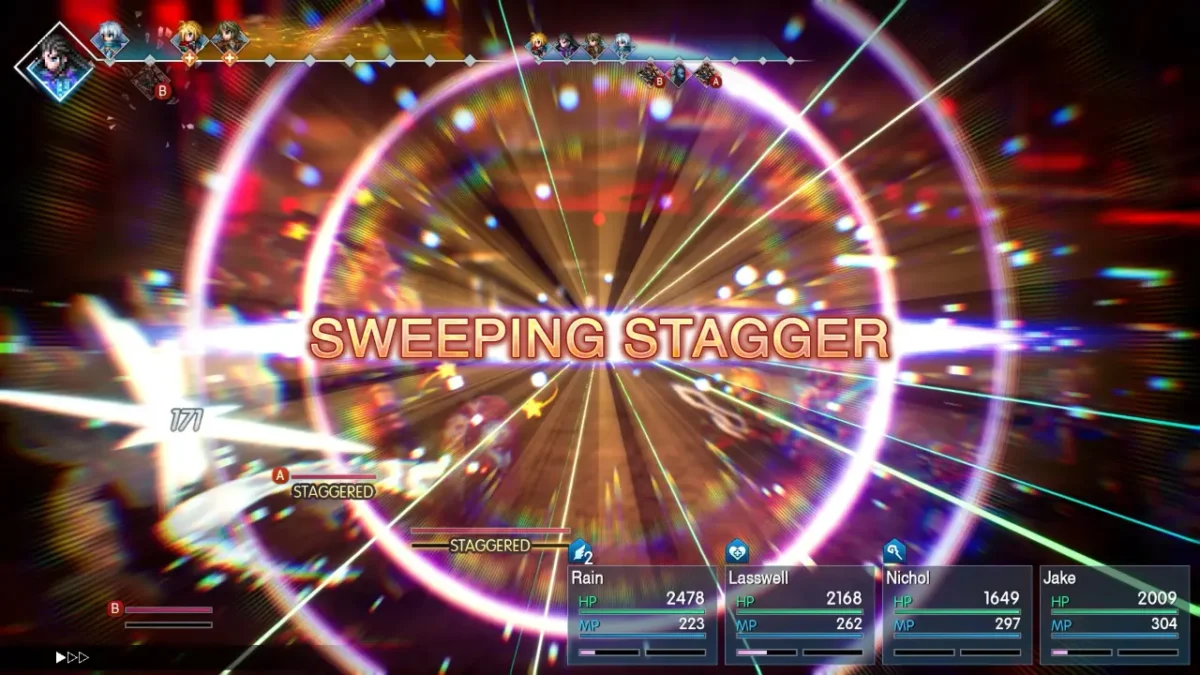
Every Resonance needs a Sweeping Stagger first. If it is your last trophy, use the farming loop below.
- My Name Is Ultima…HardGold · 1.2% of players
Defeat Ultima Weapon.
Waits in Ardra Crater, level 70, and only appears after the credits.
- Ultimate FantasyLong grindPlatinum · 0.2% of players
Obtain all Trophies.
Unlocks by itself when the other 39 are done. On Steam and Xbox it is the 40th achievement.
Nothing matches those filters.
Tablet Shards and the Oblivion Palace
There are 99 Tablet Shards, spread across 48 spots in the towns and dungeons of every island. You hand them to the Enigmatic Princess in the Oblivion Palace (southeast of Grandport Harbour in Grandshelt), and she opens a safe for each milestone. There are 25 safes in all, starting at 3 shards and ending at 99.
89 of the 99 is all the trophies ask for, because the second of the two Adamantite safes sits at 89 and Aileen needs every piece she can get. The last ten shards add one weapon and a final memory scene, nothing else. These are the safes that matter:
| Shards | Safe reward | Why it matters |
|---|---|---|
| 3 | Vitality Charm | Your first reward, which is Princess’s Reward |
| 28 | Astral Jacket | A memory scene plays |
| 60 | War Pick | The second memory scene, which is Memento |
| 64 | Magicite Cryst | A third star for a Vision |
| 76 | Ancient Firearm | One of the twelve Legendary Arms pieces |
| 80 | Adamantite | For Aileen |
| 84 | Ancient Whip | Another Legendary Arms piece |
| 89 | Adamantite | The last one Aileen needs |
| 99 | Lightbringer | Optional, with a third memory scene |
Tablet Shards glow, though a few hide behind scenery like broken pillars. Fina’s Psyche holds four, and you get into it through a book in the Tower of Mysidia after a story scene. The Colosseum has one, which appears once it opens in Chapter 4, Dragon’s Maw has one, and the Crystal Tower has three.
The Crystal Tower is the last area of the story. The game warns you that there’s no way back once you take the final teleport, so collect its three Tablet Shards and the chest with the Ancient Katana first, and keep a separate save from before it.
Adamantite and Aileen’s weapons
Aileen forges one weapon for each of the eight party members, and each weapon costs one Adamantite. There are exactly eight pieces in the game, so none are spare. She joins your airship once you finish the Forger of Wills side quest in Dilmagia, which opens in Chapter 5. Talk to the gossiping girl near the entrance, collect the three pieces of information about Aileen, then answer her questions at the shipyard.
Her weapons are strong enough that I’d get each one made as soon as you have the Adamantite. Here is where all eight come from:
- The Colosseum, as the first-clear reward for Fledgling Battle 2, Brawler Battle 2 and Brawler Battle 3 (three pieces).
- Oblivion Palace safes at 80 and 89 Tablet Shards (two pieces).
- A chest on the Rugged Mountain Path.
- The merchant ship that sails the world map, which sells one for 35,000 gil.
- A radar treasure. The Hiding Man in Gaberada gives you the Magi-tenna that powers the radar, and the Adamantite is buried just north of Olderion.
Colosseum leagues
The Colosseum sits in the royal capital, Grandshelt, and opens during Chapter 4. There are four leagues of five fights each, and the trophies only ask for the first three. Each league has its own sign-up table: green is Fledgling, blue is Brawler and purple is Gladiator.
| League | Recommended levels | Worth knowing |
|---|---|---|
| Fledgling | 25 to 32 | Battle 2 pays out Adamantite and battle 3 an Ancient Greatsword. |
| Brawler | 40 to 48 | Battles 2 and 3 pay out Adamantite and battle 5 an Ancient Cuirass. Battle 5 is two waves of elementals, seven in all. |
| Gladiator | 55 to 70 | Two Magicite Crysts and a run of rings, ending against Gargantuan Gigantuar. |
| Champion | 75 to 99 | No trophy needs it. It ends against Omega, and I’d leave it alone until everything else is finished. |
The first-clear rewards only drop once, and repeat wins give potions and ethers. Take the first run seriously.
Legendary Arms and the Chamber of Arms
Every Legendary Arm begins as an Ancient piece with poor stats that you have to track down first. The Chamber of Arms is a small temple on a mountainous island between Dirnado and Gronoa, and you fly there, put the piece on its altar and win a level 50 trial. The piece comes back as the real thing. A level 75 trial later on gives a stronger plus version, which no trophy needs.
| Ancient piece | Where to get it | Trial boss | Becomes |
|---|---|---|---|
| Ancient Greatsword | First clear of Fledgling Battle 3 | Alpherg | Ragnarok |
| Ancient Cuirass | First clear of Brawler Battle 5 | Sadalsuud | Tatenashi Armor |
| Ancient Firearm | Oblivion Palace safe at 76 shards | Alhena | Arcturus |
| Ancient Whip | Oblivion Palace safe at 84 shards | Nunki | Fire Birch |
| Ancient Bow | Talk to Chloe at the Felicitas item shop after you get the airship, then find her inside the Chamber of Arms and talk again | Dabih with a cultist and a warlock | Artemis Bow |
| Ancient Rod | Locked chest in the Abandoned Cabin, up in the northeast of Pharm. The key is with the man outside the inn in Sian | Sheratan | Wizard’s Rod |
| Ancient Accessory | Chest in Quarry Cave, on the island off Zoldaad’s west coast (airship needed) | Brachium | Gold Hairpin |
| Ancient Katana | Chest in the Crystal Tower | Aldhafera | Sasuke’s Blade |
| Ancient Hammer | Radar treasure | Tegmine | Thor’s Hammer |
| Ancient Garment | Radar treasure | Vindemiatrix | Mirage Vest |
| Ancient Tome | Merchant ship for 45,000 gil | Elnath | Last Resort |
| Ancient Cloak | Merchant ship for 40,000 gil | Shaula | Lordly Robes |
The merchant ships are the awkward part, because they wander the world map and don’t stay in one place. Keep 120,000 gil free for the Adamantite, the Cloak and the Tome, and buy each one the first time a ship offers it.
Cave Masters
There are 15, each living in a cave named after it, spread over Grandshelt, Dirnado, Olderion, Zoldaad, Mysidia, Gronoa and Pharm. They run from level 15 (Marauder, in Grandshelt) up to level 60. The three in Pharm are all level 60 and the three in Gronoa are all above level 50. Those six can wait until your party is stronger. Malboro Varietas needs the airship, since its cave is on an island north of the Town of Amore.
Weaknesses help a lot on the tougher ones. Ice works on two of the level 60s, Tartarosaurus and Titanoraidos, Wind on Gogmagog and Water on Pyroviper. Every Cave Master drops Magicite based on its level, so clearing the early ones also funds your Vision awakenings.
King Gil Snapper and Metal Gigantuar
Both live on the small island at the far end of Dragon’s Maw, the optional dungeon at Pharm’s southern tip. The airship from Chapter 5 gets you to the entrance, but the recommended level is 55 and the random fights are some of the roughest in the game. I’d wait until after the story. You can’t land on the island with the airship, which makes the dungeon the only way over. Walk around on the island and every fight is one of three things: a Gigantuar, a King Gil Snapper or a Metal Gigantuar.
King Gil Snapper is level 49 with 60,000 HP, and Ice is the only element that hurts it. Fire, Wind, Earth, Thunder and Water all heal it, Light does nothing and Dark does normal damage. It also counters physical hits, so go in with Ice magic. It’s worth farming later too, since a single King Gil Snapper pays 28,000 gil.
Metal Gigantuar is level 52 with almost no HP and a strong urge to leave. It dodges nearly everything and runs away on its third or fourth turn. Break its stagger gauge before you attack, because it can’t dodge once it’s staggered. It gives 150,000 EXP per kill, which makes this island the best place to level, and it also turns up in the Crystal Tower at up to one fight in ten.
Visions, Mastery Ranks and Espers
There are 26 Visions: a hero from each of the 16 earlier main Final Fantasy games, Sephiroth, and nine characters carried over from Brave Exvius. They come from Sanctums and shrines, sub quests, a few story moments and a fight with Sephiroth. None can be missed. Stragglers can wait for free roam. Most shrine visits come with a short quiz on that hero’s background, and the answers change nothing.
Mastery Rank belongs to a character and Vision pair. If Fina takes a Vision to MR9 and you pass it to Lid, Lid starts that Vision at MR0 and has to climb it himself. This is why rotating Visions pays off, because eight different Visions at MR9 are much easier than eight spread over a few characters. Battles are what feed Mastery points. Expert pays 1.5 times as much, and finishing a fight on a staggered enemy adds 1.3 times on top.
Awakened Light needs a Vision at three stars. A Moogle of Light (they’re in almost every town and on the airship) does the upgrades: a Magicite Shard for the first star, Magicite for the second and a Magicite Cryst for the third. Cave Masters, the Colosseum and the Oblivion Palace safe at 64 shards all hand them out, and the first Cryst turns up in Chapter 5.
There are nine Espers, and only Fina and Archwitch Fina can call them: Siren, Ramuh, Carbuncle, Ifrit, Shiva, Titan, Odin, Leviathan and Bahamut. Siren is the first, at Siren’s Tower in Chapter 1. Ramuh follows in Chapter 2 and Carbuncle in Chapter 3. Leviathan shows up once you have the airship, and Shiva lives on the island with Jotunn Cave, southwest of Mysidia.
Resonance Rapid Fire and stagger
Every enemy has a yellow gauge under its health bar. Hit its weaknesses, or use attacks built to break the gauge, and the enemy is staggered, which leaves it unable to act and takes extra damage. Stagger every enemy in a single turn and you get a Sweeping Stagger. That earns a bonus phase where everyone attacks again, and at the end of it you can fire a Resonance, the cinematic finisher of one of your equipped Visions. The stagger trophy is the easy one and arrives on its own. The Resonance trophy asks for 400 of those, and it’s the rarest achievement on Steam apart from Ultimate Fantasy, so start counting early.
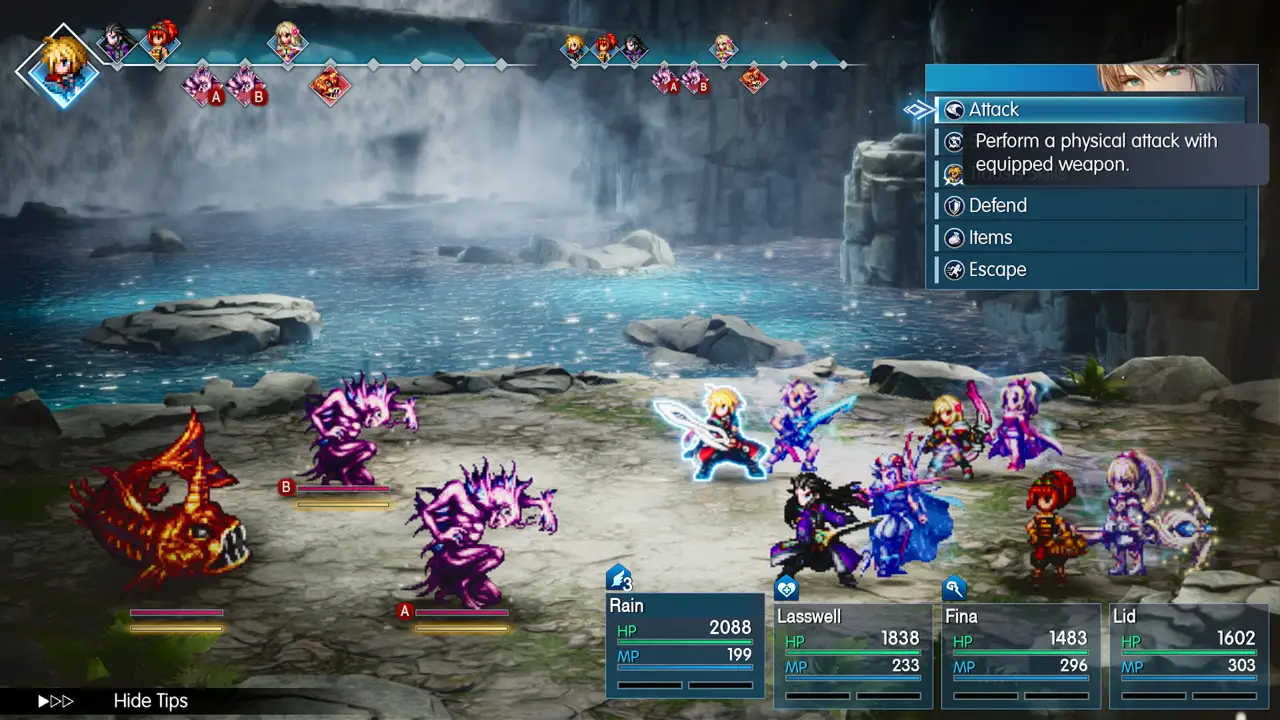
If Resonance Rapid Fire is the last trophy you have, you can farm it without wandering the map for fights. Pick a Vision with a healing Resonance (Leah and Ayaka both have one), find a battle you can stagger quickly and leave a single enemy alive. Stagger it, fire the Resonance, restore the enemy’s HP before it falls, then spend turns on Defend until you can stagger it again. Repeat that loop until the counter reaches 400.
Gil trophies
Gil Comes and Goes (spend 100,000) takes care of itself. The merchant ship’s Adamantite at 35,000, the Ancient Cloak at 40,000 and the Ancient Tome at 45,000 add up to 120,000 before you’ve bought a single piece of gear. Making Lid Proud (earn 1,000,000) counts everything you earn across the whole game. Spending never sets it back.
If you’re still short at the end, farm Gil Snappers. A Gil Snapper in Mysidia pays 13,000 gil per kill and a King Gil Snapper in Pharm pays 28,000. Finishing a battle with a follow-up hit in the Bonus Phase gives 1.3 times the gil.
Mechabo Mania
Verun at the Dwarven Forge in Dirnado upgrades Lid’s Mechabo through three requests, and finishing the third one gives the trophy.
- Arise, Mechabo! (Chapter 2). Beat two Ipoohs, the big bears near the Dwarven Forge, and bring Verun the parts.
- Mechabo Evolved (Chapter 2). Hunt three of each monster in turn: dhorme chimerae near Grandport (to the northeast), medusae southwest of the Forge, destroyers across western Olderion and sandworms in southern Zoldaad. Deliver the parts to Verun after each group.
- Mechabo Unleashed (Chapter 5). Speak to Verun on the airship, beat three mahadevas over on the western island in Mysidia and three malbodooms in western Gronoa, and hand the parts over on the airship. Gronoa only opens up in Chapter 6, so the last handover waits until then.
Ultima Weapon
Beat the story, reload your cleared save and a short scene on the airship points you to Ardra Crater, on the small island south of the Zoldaad Empire. Ultima Weapon waits in the middle of it, and you start the fight by interacting with it.
It’s level 70 with 3.9 million HP on Normal. Casual brings that down to 2.34 million and shrinks its stagger gauge from 5,000 to 2,000, while Expert raises the HP to 6.24 million. Difficulty can change at any time, so Casual is a perfectly good choice for this one.
Ultima Weapon shifts between modes during the fight, and each mode has its own weaknesses. In one it hits hard physically and is weak to Wind and Water. In another it throws status ailments around and is weak to Ice and Earth. A third leans on magic and is weak to Fire and Light. The fourth is weak to Thunder and Dark, and it’s the one that heals, buffs itself and refills its stagger gauge. Bring a spread of elements so someone always has the right one, and strip its buffs when you can.
It shrugs off most status ailments, so spend your turns on damage, healing and protection. Its big move is Ultima Beam, which has four times the power of its basic Slam. Keep the party’s HP topped up, have a revive ready and watch the turn bar for the warning before it lands.
Level 70 or higher is comfortable, and the build matters more than the level: maxed Visions, your best Legendary Arms or Aileen’s weapons and strong healing. At level 75 on Normal the fight takes close to an hour. Get comfortable first.
Did this guide help?
Something wrong or out of date? Tell us
Guide by
Sunny
Sunny’s favourite game is Stardew Valley, and she has told herself “one more day” about four thousand times. The rest of her time goes on dying in a basement in The Binding of Isaac and planning her whole week around who she’s hanging out with in Persona.
Up next in Final Fantasy Resonance
Popular right now
-
GuidesMidgame
-
GuidesEarly game
-
GuidesMidgame
-
GuidesMidgame



Squad chat
Be the first