Best Modern Warfare 4 DMZ traits: tier list and builds
Every Operator gets 18 trait points and no respec. All 18 Major traits ranked, with the solo and squad builds I would lock in.
Quick answer
Possum is the pick that beats everything else in DMZ. UAV Upgrade, Quick Fix, Die Hard and Container Looter make up the rest of my top end. Playing solo, finish Warfighter and Scout. In a squad, swap Scout for Survivalist. Nothing can be refunded, so read what you’re giving up before you confirm a pick.
Sixty-six traits, 18 points per Operator, and a confirm button that means it. There’s no respec and no refund, which is a bit rude for a menu that hides half its options behind a random roll. You will lock in something you regret at some point (I’d put money on it), so the aim is to make that something small.
How Operator traits work
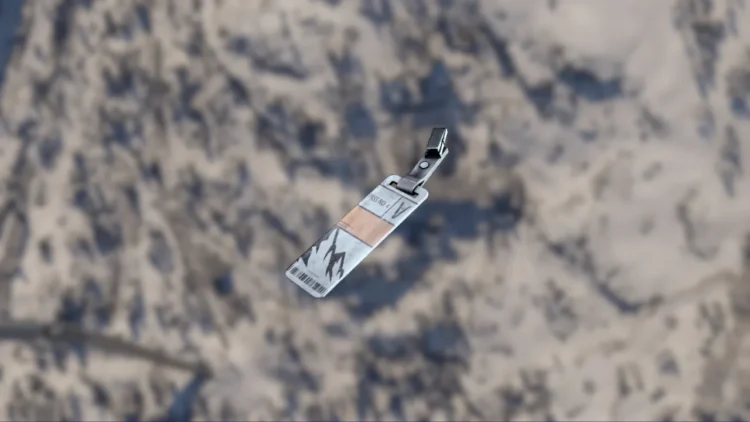
Every Operator has their own Dog Tag, and it levels up as you exfil with them. One level is one trait point. There are 18 levels, from Steel I up to Onyx III, which is where the 18-point ceiling comes from. Points stay on whichever Operator earned them, so whoever you’ve been dragging through Hajin all week is the only one who benefits. If you want those points quicker, the best ways to level up in DMZ are worth a read.
You spend them at the FOB. Head to the Operators station (it’s opposite the 3D Printer), hit Manage on the Operator you’re building and pick a trait.
There are three trees. Warfighter is for winning fights, Scout is for loot and UAV information, and Survivalist covers revives and staying useful once you’re downed. Each tree holds 22 traits. Six of them are Major traits that every player sees, and the other 16 are Minor traits that get randomised, so your tree won’t match your mate’s even on the same Operator. The first point you put into any tree always lands on a random Minor. You don’t get a vote.
The Majors come in pairs, unlocking at 3, 6 and 9 points spent in that tree. You take one from each pair and the other is gone for good. Nine points completes a tree, so 18 points buys two full trees and a lingering feeling about the third. The only ways to start again are a fresh Operator or Prestige.
Dying doesn’t wipe traits. A dead Operator goes MIA, and you pay DMZ Cash from your Bank to get them back with all their traits intact. The gear is gone and the fee climbs with each trait they’ve picked up, which makes a fully built Operator expensive to lose. That’s why the survival traits are worth more than their descriptions suggest.
MW4 DMZ trait tier list
Only the 18 Major traits are ranked here. Minors are random and there’s no planning around a roll. I’ve weighed each trait against its pair as well as the full list, because the pair is the choice the game actually makes you face.
- Possum
- UAV Upgrade
- Quick Fix
- Die Hard
- Container Looter
- Thermal Padding
- Overwatch
- Equipment Professional
- Viper Sense
- Hostile Looter
- Consumable Duration
- Free Revive
- Numb the Pain
- Combat Resistance
- Field Crafting
- Faster Revive
- Impact Smokes
- Adaptive Restock
Possum
Once per match, if something kills you outright, Possum puts you back into Last Stand with full health. From there you need a healing item and some patience. Waiting for the squad that just dropped you to wander off, then standing up behind them, is as petty as it sounds and it works more often than it should. If they’ve already looted your body you’re back on your feet with very little, and that’s the price. It’s also what stands between you and an MIA bill, and on a fully built Operator that bill is not small.
It sits at nine points in the Warfighter tree, so you’re spending half your Operator on it. Worth it. Its pair is Adaptive Restock, an extra drop from hostiles, and that is no contest.
UAV Upgrade
This is the sleeper. Every UAV you run gets more range, a longer timer and an upgrade to Advanced, which tells you far more about where enemy Operators are standing. Finding the squad that’s about to ruin your run before they find you beats most things a trait point can do. Field Crafting, its pair, loses by a distance.
A tier traits
Quick Fix cuts the wait before health starts regenerating once you’ve killed an Operator or a hostile. It’s less exciting than a second life, but it’s what lets you chain fights without ducking behind a wall to heal. I’d take it over Viper Sense, which hides you from thermal gear and AI targeting and is only the better pick if drones and scoped players are what keep killing you.
Die Hard lets you bleed out forever in Last Stand, and if you crawl up to an exfil it gets called for you. Solo, with the extraction point in sight and your legs gone, it decides the run. Its pair, Numb the Pain, gets a revived teammate back up already buffed with Painkiller and Smelling Salts. That’s the better choice with a team, and the reason it still sits in B is that it does nothing when you’re alone.
Container Looter gives each container you open a shot at one bonus item. It doesn’t fire every time, but it’s live on every container for as long as that Operator lives. I rate it above Hostile Looter, which only works on AI kills and pays out mostly in Uncommon printer ingredients.
Thermal Padding and Overwatch share a tier because they answer different questions. Thermal Padding keeps you off UAV scans and drops Advanced UAVs down to a basic ping, which suits anyone who’d rather loot quietly. Overwatch means the UAV towers you switch on never run out, which suits anyone who’d rather keep permanent eyes on the map and go hunting.
B tier and below
B tier holds the traits that are fine and nobody will judge you for. Equipment Professional slowly refills your Lethals and Tacticals up to the slot’s maximum, which means free grenades and smokes all match long. Consumable Duration stretches every consumable you use. Free Revive patches up your first Wound automatically and beats Impact Smokes. Hostile Looter, Viper Sense and Numb the Pain you’ve already met.
C tier is the stuff I’d skip. Combat Resistance softens explosive damage and enemy tactical effects, but grenades that come back by themselves are nicer than a cushion against other people’s. Field Crafting lets you craft from Common printer resources mid-deployment, which is handy once in a blue moon. Faster Revive and Impact Smokes mostly help when a teammate is close. Adaptive Restock gets D for losing to Possum, which isn’t hard.
Best trait in each pair
For anyone who only wants the verdict. Where I’ve listed two, the right one depends on how you play.
| Points in tree | Warfighter | Scout | Survivalist |
|---|---|---|---|
| 3 | Equipment Professional over Combat Resistance | Container Looter over Hostile Looter | Consumable Duration over Faster Revive |
| 6 | Quick Fix over Viper Sense | UAV Upgrade over Field Crafting | Free Revive over Impact Smokes |
| 9 | Possum over Adaptive Restock | Thermal Padding or Overwatch | Die Hard solo, Numb the Pain in a squad |
Best DMZ trait builds
Fill Warfighter first on any build that includes it. Possum is the last trait in the tree, and it’s the one that stops you bleeding Operators while you level up the second tree.
Solo: Warfighter and Scout. Equipment Professional, Quick Fix and Possum, then Container Looter, UAV Upgrade and Thermal Padding. You get a second life, grenades that come back, faster healing between fights, more loot per container and better UAV information, plus a trait that hides you from everyone else’s UAVs.
Squad: Warfighter and Survivalist. The same Warfighter picks, then Consumable Duration, Free Revive and Numb the Pain. Possum looks after you and the Survivalist half looks after everyone else.
Squad support: Scout and Survivalist. Worth running when a teammate already has the Warfighter build. Container Looter, UAV Upgrade and Overwatch for loot and towers that never switch off, then Faster Revive, Free Revive and Numb the Pain on the medic side. You’ll be the one crawling over to downed teammates, so Faster Revive earns its slot here.
Each Operator levels on its own, so none of this has to be one build. A Warfighter and Scout Operator for the nights you’re alone and a Survivalist support Operator for when you’ve got people is a perfectly sensible roster.
Minor traits worth taking
Minors are randomised, they arrive in groups of three after each Major you unlock, and each costs one point. When these roll, take them:
- Plate Speed makes plating up faster, and a quicker plate swap mid-fight is worth more than it sounds.
- Fast Learner gives your Operator slightly more XP, which gets you to the next point sooner.
- Combat Scavenger gives AI kills a small extra chance of dropping an ingredient or something valuable.
- Expedited Extraction brings the helicopter in quicker, which is a lot of nervous standing around saved.
- Quick Knife swaps the gun bash for a knife attack when you melee.
- Lucky improves your odds of finding something useful when you’re afflicted or running short on supplies.
Deep Breath adds underwater breath time, so it’s for the three people who like swimming in a Call of Duty game.
Operator Prestige
You can Prestige an Operator who has hit Onyx III with all 18 points spent and isn’t MIA. It costs gear and ingredients plus 200,000 DMZ Cash for the first one, wipes the regular traits and hands over a random Prestige trait that stays for good. Three is the cap. All of that runs separately from player Prestige, which has its own Classic or Regular decision.
Did this guide help?
Something wrong or out of date? Tell us
Guide by
Josh
Josh plays a lot of Arc Raiders and yells “friendly!” into proximity chat more than he should. He gets shot anyway. He’s also a horror fan who has quit more games at the first jump scare than he’ll admit, and he runs a Supermarket Simulator shop he’s weirdly proud of.
Up next in Call of Duty: Modern Warfare 4
Popular right now
-
GuidesMidgame
-
GuidesEarly game
-
GuidesMidgame
-
GuidesMidgame


Squad chat
Be the first