
Castlevania Belmont’s Curse bosses: all 18 encounters and how to beat them
Every boss in Castlevania: Belmont's Curse: health, arena, rewards and a tactic for each, plus the fights you cannot win and what each ending needs.
Spoiler warning. This guide names bosses, areas or story moments. Bigger reveals stay hidden in spoiler blocks until you open them.
Quick answer
Castlevania: Belmont’s Curse has 18 boss encounters and 14 different bosses, because Death, Isaac, Joan and Dracula each appear twice. The first Death fight and the first Isaac fight cannot be won, and Brauner is a scripted scene with no fight, and Saint Louis is a trial with no health bar. Chains of Justice is the one control spell that works on most of the bosses that matter, and you get it from Saint Louis, so do that trial early. Always stop at a Mirror of Life before a boss door.
This list of Belmont’s Curse bosses follows the usual route through the game. You can reach some of these in a different order, but the requirements for each are listed, so you can see what you need before you go. If one fight keeps beating you, Custom Mode can tone it down, at a cost to some achievements.
All 18 boss encounters
| # | Boss | Arena | Health | XP | Rewards |
|---|---|---|---|---|---|
| 1 | The Fallen (Leon) | Gate to the Catacombs, Paris Streets | 800 | 400 | The Fallen card, Holy Cross, Arcane Whip |
| 2 | Medusa | Serpents’ Lair, Holy Innocents’ Cemetery | 1,500 | 500 | The Prophetess card, Petrifying Gaze, Rusted Harpe, Aegis |
| 3 | Joan of Arc | Roof of the Tower, Prison Tower | 1,800 | 600 | The Warrior card, Infernal Pyre, Holy Light, Burnt Sword of Fierbois |
| 4 | Death (first) | Ritual chamber, Stairway to Hell | Scripted | None | Nothing |
| 5 | Isaac (first) | Main Hall | Illusion | 750 | Nothing |
| 6 | Talos | Throne of the Builder, Clock Tower | 5,000 | 900 | The Builder card, Fist of Talos, Smash |
| 7 | Carmilla | Observatory, Library | 4,500 | 850 | The Occultist card, Blood Spikes, Aerial Rush |
| 8 | Brauner | Brauner’s Atelier, Main Hall | No fight | n/a | The Artist card, Masterpiece |
| 9 | Mammon | Mammon’s Lair, Catacombs | 8,000 | 1,000 | The Miser card, Wheel of Chaos, Ferryman’s Obol |
| 10 | Joan of Arc (rematch) | Courage Bell, Notre-Dame | Larger bar than the first fight | None | Blessing of Courage |
| 11 | Death (second) | Transept, Notre-Dame | 8,444 | 1,000 | The Shadow card, Soul Harvest |
| 12 | Saint Louis | Tree of Justice, Palace of Justice | No health bar | None | The Judge card, Chains of Justice, Valmanway |
| 13 | Isaac (second) | Heart of the Clock, Clock Tower | 2,500 | 1,000 | The Zealot card, Chronomantic Dive, Chauve-Souris |
| 14 | Dracula (first) | Court of the Night, Master’s Quarters | 7,666 | None | Trophy |
| 15 | Succubus | Hall of Mirrors, Belmont Manor | 8,000 | 1,200 | The Temptress card, Life Drain |
| 16 | Doppelganger | Gallery of the Four Virtues, Notre-Dame | 8,778 | 1,000 | The Self card, Absolution, Doppelganger outfit |
| 17 | Arthur | Chapel, Notre-Dame | 11,000 | 500 | The Brittle King card, Stained-Glass Shield, Excalibur |
| 18 | Dracula (second) | Court of the Night, Master’s Quarters | 7,666 | None | Trophy |
Five encounters give no Arcana card: the first Death, the first Isaac, the Joan rematch and both Dracula fights.
The Fallen
The Fallen is the tutorial boss, with 800 health. He throws his Holy Cross and it comes back through his own body, so one jump is not enough. Break it in the air with a weapon strike. His three-hit claw combo leaves his back open, so dash through him as it ends and hit him from behind.
Once his health is low he swings from the Anchor above the arena. Crouch or slide toward the walls and jump the shockwave when he lands. His whip grab is slow and shows a strand first, so move when you see it. The fight pays out the Arcane Whip, which you need for most of what follows. You reach the arena through the Sewer Reservoir and the Path of the Rat.
Medusa
Medusa has 1,500 health and never stands on the same platform as Rose. Infernal Pyre only spreads along the floors she is not on, so it does nothing here. Take Holy Cross, and use the Lance for pokes at range. The Arcane Whip cannot grab her, so attack after her moves end.
Stay off the lower platforms, with one exception. When she leans back to charge her petrifying sweep, a boulder drops on the lower platform on the opposite side from her. Stand behind it. In the later half she summons Medusa Heads and hits the upper platforms, so cross to the far side and keep throwing crosses. When she charges the gaze, turn away. The arena is behind the Roman Baths.

Joan of Arc
Joan has 1,800 health and her greatsword controls the space in front of her, so standing toe to toe costs you more than it gains. Dash past her and work on her back instead. From that angle she only has a short backward jab to answer with, which is easy to read. A fast weapon that lets you chain hits suits this fight.
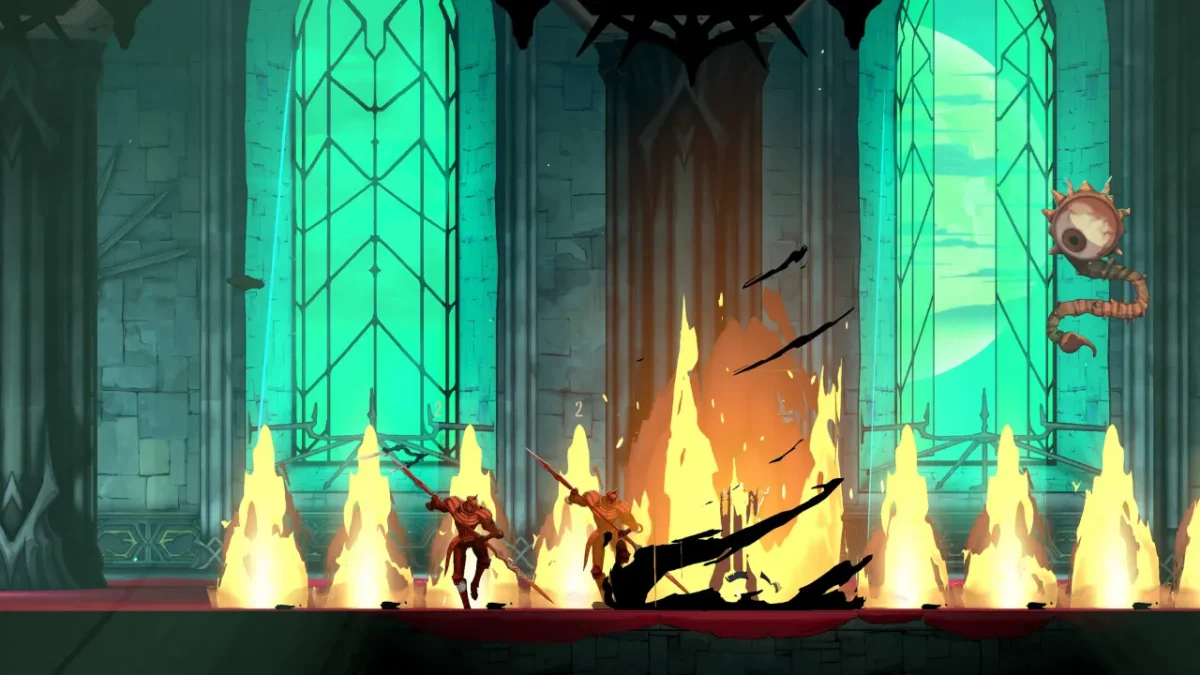
When fireballs gather overhead and she raises an arm, they fall as columns of flame with gaps between them. Pick a gap and stay in it. Her thrusts pass over a crouching Rose. Slide under her normal sword swings, but jump or back off when she drags the blade along the floor, because that low slash hits you mid-slide. At half health she absorbs the fireballs and her moves get longer reach. For the jump that sends fire along both sides, grab one of the two Anchors above the arena. Each one goes dark for a moment after use.
She drops Holy Light, which clears the Chaos Shards that block passages and opens the gate to the Catacombs, along with Infernal Pyre, the Burnt Sword of Fierbois (25 attack) and The Warrior’s Key.
Death (first encounter)
You cannot win this one. It ends on a cutscene whatever you do, and his touch kills Rose. There is no game over. Do not spend Potions on it.
Isaac (first encounter)
This Isaac is an illusion in the Main Hall and it drops nothing. Keep your distance, avoid his direct attacks and hit him after his combos end.
Talos
Talos has 5,000 health and guards the Throne of the Builder at the bottom of the Clock Tower. You reach it through the Builder’s Secret Elevator, the Foundry Apex and the Final Trap. The false throne room off the Clock Tower Bridge is a trap that commits you to the bad ending, so do not go in.
He cannot be hurt while his drones are flying. Destroy them and he staggers, which is your window. Get clear straight after, because his recovery punch is wide. Platforms stop his spiralling fire volleys, so use them for cover. The wide fire curtain is not worth attacking through, so shelter under a platform and wait. Yellow mines show their blast radius with a circle, so find a spot outside all of them. About halfway through, the fight moves west to a second foundry chamber and then returns to the first arena for the finish.
Fire and bleed do nothing to him. Chains of Justice works. He drops Fist of Talos and Smash, and Smash lets you break the gold-cracked floor near the arena to reach the chest with the Fists of Talos.
Carmilla
Carmilla waits in the Observatory at the top of the Library with 4,500 health. To get there, read the Star Chart in the Planetarium and turn the rings in the Observation Tower until the nodes match the constellation.
The fight starts with a curse that puts an 8 over Rose’s head. Each blood hit lowers it, and at zero you get an instant-kill grab. She also takes no damage while two skull shields orbit her. Break the shields first by jumping the high point of each blood wave, then attack. In the second half the blood pillars come in patterns you can read. In the last stage she traps you in the middle with rows of pillars and waves from both sides.
She gives you Blood Spikes and Aerial Rush.
Brauner
There is no fight here. Brauner’s Atelier is west of the Servants’ Hall in the Main Hall, and the encounter is a scene that plays once you break his sculpture. Grapple up until Rose is above the gold-cracked block hanging in the middle of the room, then press down and attack to Smash onto it. You need Talos beaten first, because Smash comes from him.
Brauner drops in angry about the broken sculpture, talks, and hands Rose his power. Nothing attacks you and there is no health bar, so it counts as a boss mostly because the card comes with it.
You get The Artist and Masterpiece, which opens the route into Notre-Dame through the painting in the Gallery of Eternal Night.

Mammon
Mammon is optional for the normal ending and has 8,000 health. He sits behind the flesh-and-eyes door in the Circle of Greed, and the door only opens with the Thrilling Eye, the Trembling Eye and the Oozing Eye all equipped at the same time.
His floor slams and energy beams cover most of the chamber. The Anchors overhead let you stay in the air during the slams, which removes the worst part of the fight. Weave between the beams and attack while he is hovering or recovering. His hoard holds the Ferryman’s Obol, which the Ferryman swaps for The Whisperer and its Freezing Path spell. You need The Whisperer for the true ending.
Joan of Arc (rematch)
Joan comes back in the Four Virtues Trials at the Courage Bell in Notre-Dame. You start it by equipping The Warrior with Infernal Pyre and interacting with the stained-glass window. She has the same moves, plus the Blazing Thrust, and she is faster. Her health bar is a lot bigger than in the first fight, and when she seems to be beaten she recovers most of it and starts a second phase.
There are no Anchors in this arena, so Double Jump is the main way to get through her fire plunge. Holy Light can block her strongest attacks. Winning gives you the Blessing of Courage, one of the four virtues you need for the true ending.
Death (second encounter)
This is the real Death, with 8,444 health, in the Transept at Notre-Dame. To open it you need The Builder, The Artist and The Occultist, then you have to clear the corruption on the Great Organ by playing three melodies.
Duck his low horizontal slash and stand up straight away to punish. When a dark aura builds around him and his hand glows, slide or air dash away before he gets to you. When he calls out and teleports, tracking beams follow. Get low, let them follow you up, then drop back down, because they cover more than they look like they do. After the last beam he reappears next to you and swings the scythe. Dash toward him, because it passes under the arc.
At half health, sickles orbit the arena and you can destroy them. His horizontal slash gets a spinning sickle throw and a second, lower slash, so move upward for that one instead of ducking. The soul barrage comes in three waves. Chains of Justice roots him, and bleed does not work.
He gives you Soul Harvest. Trevor then hands over the Vampire Killer in the Deacon’s Quarter infirmary, and Double Jump unlocks in the Choir once the tutorial box closes.
Saint Louis
Saint Louis never attacks. The Tree of Justice in the Palace of Justice is a trial, and the way in is a collection check. You need four full Brave Hearts and four full Wise Hearts, which is 16 Brave Heart Fragments and 16 Wise Heart Fragments, and you must have the Arcane Whip, Holy Light and the Fallen, Medusa and Joan behind you.
Stand on the left pan of the scales and interact. Rose’s health and mana drain while the scales settle. Go in with both full, at least 160 of each, and keep interacting until the scene starts. If you have not collected enough fragments, you run dry before the scales balance.
You get The Judge, Valmanway and Chains of Justice, which costs 40 mana and roots enemies around Rose for 4 seconds. The Judge is needed for the true ending.
Isaac (second encounter)
The real Isaac has 2,500 health and hits harder than anything before him. To reach him, equip The Shadow, use the clock on the Clock Tower Bridge to break the Cursed Horologium, then climb through the Clockmaker’s Atrium using the red clock switches.
Slip behind his spear dash or jump it. When the clock face turns black, green beams are about to cross the upper level, so drop to the lower floor. The ghost copies deal no damage, so ignore them. His spear strings always end with a pause, and that pause is when you hit him. He drops The Zealot, Chronomantic Dive and the Chauve-Souris.
Succubus
The Succubus is at the end of the Descent into Memory in the Hall of Mirrors at Belmont Manor, with 8,000 health. She is a step up from everything before her, so go in with a full Potion stock. She fights from behind a barrier that drops when you destroy her illusory copies, and she opens a stun window when it does. Spend everything in it.
Her flying kick crosses the room in a Z pattern. Jump the kicks, and when she has finished the third dash, close in. After half health she teleports more, fires more projectiles and adds a fourth dash, so wait for it to end. She gives you The Temptress, Life Drain, a full map of the Hall of Mirrors and 1,200 XP, the most of any boss.
Doppelganger
The Doppelganger only appears once Rose has all four virtue blessings from the stained-glass trials. You face it at the altar in the Gallery of the Four Virtues. Its health bar shows ??? at first and then settles at 8,778, as Rose’s own shadow.
It uses Rose’s own moves against her, including weapon dashes and air strings. Get behind it during each combo and hit back once the last strike lands. A purple flash in the mirror warns of a teleport. While IMMUNE is on screen it takes no damage, so save your mana for after, jump the waves along the ground, and stay in the air while the dark pillars rise. It gives you The Self, Absolution and the Doppelganger outfit. You need Absolution for the true ending.
Arthur
Arthur is optional for every ending. He has 11,000 health and waits in the Chapel on the east side of Notre-Dame, past the East Gallery. Finish the Feat of Strength, equip the Fist of Talos spell and pull the sword from the altar. He rises as a giant knight made of stained glass.
Fire and bleed do nothing, and Chains of Justice roots him. He sweeps glass shards along the floor and fires wide light beams. Jump the sweeps, stand in the gaps between the beams and attack in the slow recovery at the end of each move. Excalibur drops here with 100 attack power, and that alone makes it worth doing. You also get The Brittle King and the Stained-Glass Shield.
Dracula
Dracula has 7,666 health. In the Court of the Night he teleports and summons pillars of flame. Let him finish each cast before you close in, and go through the gaps in the columns. Enough damage pulls Rose into a void and the fight moves to the Castle Rooftops, where he becomes a winged demon. Meteors land in marked spots and his claw sweeps have clear wind-ups. Move before each hit and attack in the recovery.
Fire, bleed and the Arcane Whip do nothing to him, and neither fight gives a card. Your route here decides the ending.
| Ending | What you need |
|---|---|
| Bad | Walk the corridor past the Cursed Horologium into Death’s trap. The Cursed outfit comes with this ending |
| Normal | Disable the Cursed Horologium with Soul Harvest, then climb to the top of the Clock Tower |
| True | The Warrior, The Sage, The Judge and The Whisperer cards, all four virtue trials, the Doppelganger beaten, the Cursed Horologium disabled with Soul Harvest, and The Self equipped. After his second form falls you have about 10 to 12 seconds to hold the button for Absolution |
The four virtue trials each need their own spell equipped: Infernal Pyre for Courage with Joan, Mirror Walk for Prudence with Eleanor, Chains of Justice for Justice with Saint Louis, and Freezing Path for Temperance with the Ferryman. The Sage is Eleanor’s card and you collect it at her tomb in Holy Innocents’ Cemetery. Her quest runs through the Hall of Mirrors, which is why the Succubus counts as part of the true ending route.
What works on bosses
Freeze, petrify and knock-up do nothing to the bosses. Chains of Justice is the exception and roots Arthur, Death, Dracula, Medusa and Talos. Bleed does not work on Arthur, Death, Talos or Dracula. Fire does not work on Arthur, Talos or Dracula. Medusa cannot be knocked off a platform, and Dracula cannot be hooked with the Arcane Whip.
Which bosses are optional
| Boss | Needed for |
|---|---|
| The Fallen, Medusa, Joan | The normal ending. Their keys and Holy Light open the way |
| Talos, Carmilla, Brauner | Notre-Dame, and so the rest of the game |
| Mammon | The true ending, through The Whisperer. Optional for the normal ending |
| Saint Louis | The true ending, through The Judge |
| Succubus | The true ending, because Eleanor only gives The Sage after the Succubus is beaten. Optional for the normal ending |
| Joan (rematch) and Doppelganger | The true ending |
| Arthur | No ending. Optional, and worth it for Excalibur |
What to bring
Do the Saint Louis trial early so Chains of Justice is available for the fights it works on. Carry a ranged option for Medusa, such as the Lance, and switch to Excalibur once you have taken it from Arthur. Visit a Mirror of Life before every boss door, since it refills health and Potions at no cost.
Did this guide help?
Up next in Castlevania: Belmont's Curse
Something wrong or out of date? Tell us
Guide by
George
George grew up on Dark Souls and Call of Duty, and he still has strong opinions about both. He also plays Arma, where he walks a very long way to get shot by someone he never saw. He says it’s part of the experience.
Popular right now
-
GuidesEarly game
-
GuidesEarly game
-
GuidesEarly game
-
GuidesEndgame




Squad chat
Be the firstStart the chat