
ARC Raiders Frigate guide: boarding, Power Cores, cargo and loot
How to board the ARC Frigate in ARC Raiders, work through its Power Cores, loot the cargo for Amplification Modules and get back down alive.
Quick answer
You can’t shoot the Frigate down, so stop trying. You climb aboard. Queue a map that shows the ARC Frigate tag, ride a Reclaimer up with Disrupt, and bring a squad of three, because the middle Power Core needs three people on three controls at the same moment. Break the cores, shake the cargo loose, loot it and ride a Reclaimer back down. Don’t jump off the hull.
Fresh content. Frozen Trail 2.0 only went live on 8 October and Embark is still tuning the ship, including a cargo drop fix on 13 October. If a prompt or a room doesn’t match what’s written here, trust the game. It’s the one that gets patched.
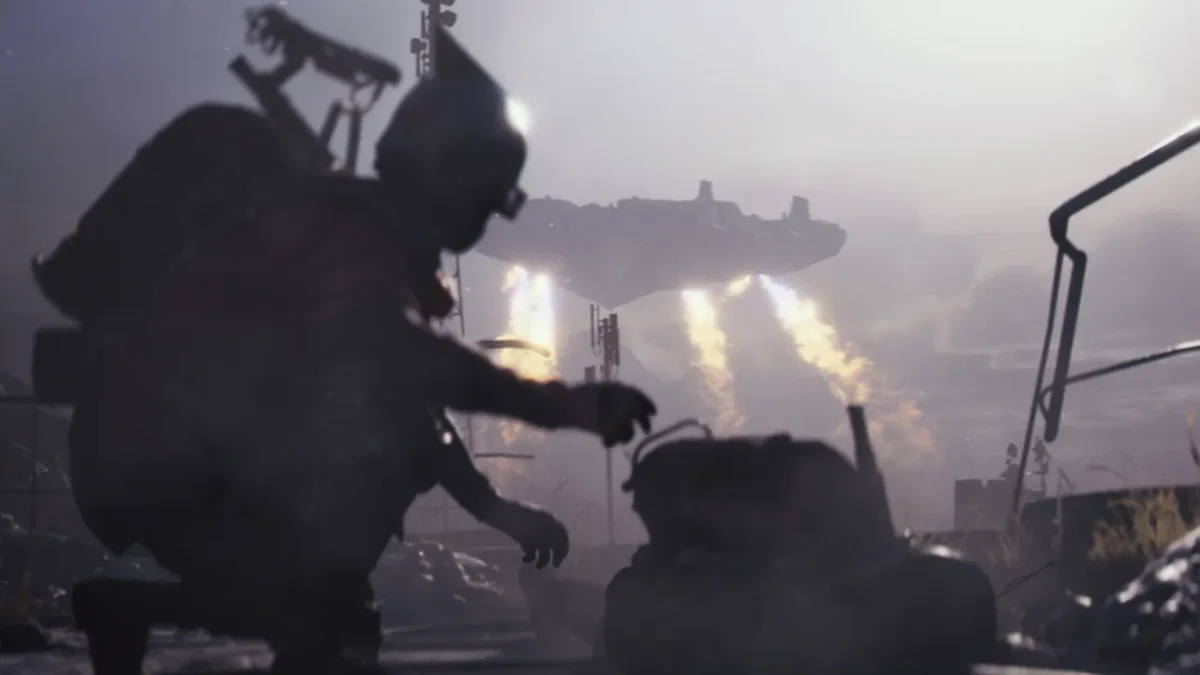
This is the biggest thing Frozen Trail added to the main game, and it plays nothing like a normal raid. A huge ARC ship hangs over the map, you hitch a ride up on one of its drones, and then you fight your way through its insides against turrets, flying ARC and other Raiders who want the exact same loot. Relaxing stuff. I love it, but I won’t pretend it’s calm.
It rewards a plan. Walk in with a full bag and a random squad and it’ll eat you. Below is how to get aboard, what the two Celeste quests want, how the ship opens up from the first deck to the cargo, how to deal with the Hydra, and how to leave with your loot still in your pockets.
The Frigate at a glance
| What | Details |
|---|---|
| What it is | A map condition added in Frozen Trail 2.0. You board the ship, you don’t kill it |
| Maps | Six of them: Spaceport, The Blue Gate, Riven Tides, Pendola Pass, Buried City and Dam Battlegrounds. Stella Montis doesn’t have it |
| Rules | No free loadout, no locked doors, no Raider Hatches, and the loot lying around everywhere else on the map is worth less |
| Squad | Three is the real number. The middle core needs three controls held at once |
| Prize | Amplification Modules, ARC loot and weapon amplification materials from the cargo |
| Quests | Boarding the Frigate and Disrupting the Frigate, both from Celeste |
How to find a Frigate raid
You won’t stumble into the Frigate by accident. It appears as a tag under the map name on the deployment screen, and any of the six maps above can carry it. Check the tags, queue the map that has it, and assume other squads did the same. Yes, that means company.
Two things change the second you drop in. Raider Hatches are switched off, so your only way out is a normal extraction point, and the locked doors you know from normal raids aren’t in play. The free loadout is off too, so whatever you bring is what you fight with.
What to bring
- Healing and shields. Fire damage stacks on the upper deck, so a full stack of heals matters more than an extra gun.
- Something with punch for the Hydra. Launchers and heavy weapons earn their slot here, and the quest rewards even hand you Launcher Ammo. Subtle hint, Embark.
- A Snap Hook or grappling hook. It skips the lift and gets you onto ledges the squad would otherwise queue for.
- Space in your safe pocket. Modules go in there before you extract. A pocket full of junk means a module in your open bag, and other Raiders will happily take that off you.
How to board
- Walk to the back of the ship. A Reclaimer drone hovers low under the stern. Let it sink all the way to the ground before you step on.
- Stand on it and hold Disrupt for about three seconds. It lifts you toward the ship.
- At the docking bay, use Disrupt again and hop out onto the hull. The objective now sends you looking for a route up to the top deck.
- Don’t hang around on the ground under the ship. The cannon in its belly punishes anything standing in the open, so keep moving.
Getting up the lift
The way up from the hull is a lift with two Move Up controls. Two Raiders have to hold them at the same moment. Once they’re up, a solo control at the top brings the rest of the squad. So two players can get a lift moving, and a third is nice to have, but you don’t strictly need all three here. A Snap Hook skips the whole thing, which makes it the cleanest option for a solo player. Honestly, I’d bring one even in a trio.
The two Celeste quests
Both are worth doing in one raid, because the second picks up where the first leaves off.
| Quest | What it asks | Reward |
|---|---|---|
| Boarding the Frigate | Make it up top, then put 100 damage into each of a Rocketeer, a Hydra and a Vaporizer. Dealing the damage is enough, nobody has to die | Snap Hook, Wolfpack, Rascal I, 3 Launcher Ammo and 10,000 XP |
| Disrupting the Frigate | Destroy the Power Cores on top, then take down a Hydra, two Rocketeers and two Vaporizers | Hullcracker I and 10,000 XP |
Disrupting the Frigate also hands you a Powered Descender and a Vita Spray when you accept it. The quest log can show a few extra steps, like getting into the cargo and looting it, and you’ll be doing that anyway. Read the live list in your log.
Getting through the ship
The ship opens in stages and you can’t skip ahead, so it helps to know the order.
1. The first deck
You land among Hydras, Rocketeers and Vaporizers. Up to four Hydras can be up here, and a Hydra you destroy stays destroyed, which is the nicest thing this ship does for you. Clear them and the ARC around them before you touch a core. Sealed panels close off the rooms. Each one opens when you hit its one weak spot, so find the glowing patch and shoot it. Nobody ever solved a Frigate door by being polite.
2. The five Power Cores
There are five cores on the upper deck and you can take them in any order. Split the squad and work two at once if you’re confident. Each core sits behind a rotating ring of shields, so shoot the shields first. Some cores sit by fire rooms. Taking out the small core in each of those rooms kills the flames and the wind that comes with them. The outer cores also have heat vents that burst into fire on a timer, so don’t stand on them while you shoot.
The wind on this deck can throw you off the edge. Run into it, not away from it, and keep your back to cover.
3. The middle core
This is the three-player bottleneck, and it’s the reason your friend who’s ‘just five minutes away’ suddenly matters. Three Raiders each have to hold one of the controls ringing the core together. It rises for about 20 seconds and exposes four shields you have to shoot down. You can’t breach them by hand, so bring the damage. Once the middle core and the five outer ones are down, the big gate above the cargo hall powers up and the way down opens.
4. Dropping into the cargo deck
Drop through that gate onto the hall floor, roughly 20 metres below. There’s no other way in. Fore doors with four yellow weak points lead to the side halls. An aft door with its own weak points leads to the fan tunnel, where acid fills the middle until you shoot the weak points on the fans.
5. Latches, gate and the ratchet
- Four cargo latches. Each has a core with two shields. Shoot the shields, then two Raiders breach the latch together for a second or two.
- The cargo gate core. Between the two aft latches there’s a red-lit hatch over a shaft with red lamps. Drop down, shoot the two shields on the core there, and the gate under the cargo pod powers up.
- The ratchet. Two Raiders each take a handle, one at each end of the pod, and work them together. Expect to repeat this a few times. Counts of three and four have both been reported. It’s a lot of teamwork for a shipping container.
6. The drop
Once the last latch opens, the pod releases and falls on thrusters. Standing beside it when it lands can kill you, which is a rough way to waste twenty minutes of work. Jump on top and ride it down. Then open the compartments, 12 on each side, and watch your back. ARC waves land next to the pod while you loot.
How to beat the Hydra
Picture a turret split into three sections, each with its own guns. Its shots lock onto different players, so huddling behind a single wall is how you lose a squad. Spread out, take separate cover and focus one section at a time. My rule is simple: if the Hydra’s shooting, I’m moving. Break line of sight on the Rocketeers between volleys, keep a heal ready for the Fireflies and wear a shield, since fire adds up fast.
Solo, duo or trio
| Squad | What works |
|---|---|
| Solo | Board with a Snap Hook, farm the Hydra deck and the Breach and Search ports under the hull. The middle core wants three controls at once, so the cargo’s out of reach unless strangers join in |
| Duo | The lift and ratchet are fine. The middle core needs a third, so plan around friendly Raiders showing up or skip the cargo |
| Trio | The intended setup. Two work the lift and the latches, the third watches the doors and handles the Hydra |
What drops
Amplification Modules come in Mk I to V, and the Frigate and the Emperor boss are the only places they drop. On the ship you find them in the round Breach and Search ports on the underside and in the cargo itself. The cargo also holds assorted ARC parts, materials for amplifying weapons and the odd furniture blueprint. Drop rates are still unconfirmed, so don’t plan a farm around one number.
Move modules into your safe pocket the second you find them.
How to get out
Raider Hatches are switched off for the whole raid, so you leave through a regular extraction point. Ride a Reclaimer back down. Jumping off the hull is how a good run ends badly. Other Raiders know this ship holds the good loot, so treat the walk to the exit as part of the fight.
What Embark changed on 13 October
Embark’s Store Update 2.1.0 notes touch the Frigate in a few places. Hatches now burn you when they open, cargo collision is smoother, the cargo drop was adjusted to prevent unintended knockouts, and cargo drop points on Pendola Pass were moved. Squads also start closer to the action in some rounds. The old advice to stay well off the edge of the drop still makes sense, but the worst of that bug should be gone.
Common mistakes
- Queueing a Frigate map with a random squad and no plan for the middle core.
- Fighting the Hydra from one spot and getting picked apart.
- Leaving modules in your open bag and then acting surprised. I’ve done it. It stings.
- Standing next to the pod when it lands.
- Looting for too long while the ARC waves arrive.
FAQ
Can I do the Frigate solo?
You can board it, farm the first deck and finish the first Celeste quest. The cargo’s the part you can’t finish alone, because the middle core needs three controls held together.
Do I need to kill the Frigate?
No. You can’t destroy the ship. You break its cores and take the cargo.
Which maps have it?
Spaceport, The Blue Gate, Riven Tides, Pendola Pass, Buried City and Dam Battlegrounds. Look for the ARC Frigate tag under the map name.
What about the Bully?
That’s a different fight on the same patch cycle. Our Bully guide covers the weak points and where to farm Fragmenters.
Something wrong or out of date? Tell us
Guide by
Josh
Josh plays a lot of Arc Raiders and yells “friendly!” into proximity chat more than he should. He gets shot anyway. He’s also a horror fan who has quit more games at the first jump scare than he’ll admit, and he runs a Supermarket Simulator shop he’s weirdly proud of.
Up next in ARC Raiders
Keep playing
-
GuidesEarly game
-
GuidesMidgame
-
GuidesMidgame
-
GuidesMidgame

Squad chat
Be the first